Chapter 3 - Solid Video
Introduction
In this tutorial we will cover how to load and save data video links to a Personal Online Datastore (Pod) and display it on screen. A slightly more sophisticated UI will also be used.
What you will learn
- How to read and write video URLs to a Pod
- How to embed video in a page
- How to add a sidebar
- How to add a menu bar
- How to display modal dialogs
- How to add a DOAP project file
The App
The video app follows the model of the previous clipboard app but adds a few more features to the UI and allows embedding of a video element via an iframe. A demo and the source code can be found in the footnotes.
The data format used for storing a video in a file here is:
<#this> <http://rdfs.org/sioc/ns#content> "content" .
The predicate here is an HTTP URI that uses the SIOC vocabulary. In this case the content is an embeddable video URL (as a string). This is fetched after login using the code:
  $scope.fetchVideo = function() {
    f.nowOrWhenFetched($scope.storageURI, undefined, function(ok, body) {
      var video = g.any($rdf.sym($scope.storageURI + '#this'), SIOC('content'));
      $scope.setVideo(video);
    });
  };
The setVideo function simply embeds the video file in an iframe element after determining the width and height (for mobile optimization). Note: that because of CORS not all video URLs are embeddable in an iframe. For example with youtube videos they URL should take the form /embed/<id>.
    var height = Math.round(( width * 3 ) / 4);
    var iframe = '<iframe width="' + width + '" height="' + height +
                 '" src="'+uri+'"></iframe>';
    $('#video').empty().append(iframe);
While previous apps have been a single canvas, this app adds a few more features to allow extensibility. Flexbox is used to add a header and side bar. There are many guides to flexbox online, so it wont be covered here.
    <!-- menu -->
    <div class="card">
      <div class="toolbar">
        <div class="toolbar__left mr+++">
          <button class="btn btn--l btn--black btn--icon" lx-ripple>
            <i class="mdi mdi-menu"></i>
          </button>
        </div>
        <span class="toolbar__label fs-title">Videos</span>
        <div class="toolbar__right">
          <lx-dropdown position="right" from-top>
            <button class="btn btn--l btn--black btn--icon" lx-ripple lx-dropdown-toggle>
              <i class="mdi mdi-dots-vertical"></i>
            </button>
            <lx-dropdown-menu>
              <ul>
                <li><a ng-click="openDialog('about')" class="dropdown-link">About</a></li>
              </ul>
            </lx-dropdown-menu>
          </lx-dropdown>
        </div>
      </div>
    </div>
    <!-- end menu -->
The code snippet above shows the addition of a menu toolbar. In this case some of the lumx effects are used, including dropdown, ripple, toggle and menu. A dropdown is added that triggers an about model using the openDialog('about') function. The code for this brings to the top the "about" div and allows it to close on escape.
  $scope.openDialog = function(elem) {
    LxDialogService.open(elem);
    $(document).keyup(function(e) {
      if (e.keyCode===27) {
        LxDialogService.close(elem);
      }
    });
  };
The sidebar is created using flexbox and is shown only if the is enough space on the screen.
      <!-- sidebar -->
      <div flex-item="2" flex-item-order="1">
        <div class="sidebar sidebar--shown" ng-class="{'sidebar--shown': isVisible()}">
          <div class="sidebar-menu">
            <ul>
              <li><a class="sidebar-menu__link">Sidebar</a></li>
            </ul>
          </div>
        </div>
      </div>
      <!-- end sidebar -->
Further description of the UI is out of scope of this tutorial, but there each element is well documented elsewhere.
To wrap this app up a manifest.json file is added so that machines are able to tell more information about it. One particularly useful function in the chrome browser is to use the menu option "Create application shortcuts" which will package webpage as an app, that can be run on desktop or mobile.
The DOAP ("Description of a Project") system is used to add linked data fields to an app. It is stored in doap.ttl which gh pages conveniently serves using the mime type text/turtle. Autodiscovery is performed using the line
<meta href="doap.ttl#this" rel="http://www.w3.org/ns/solid/app#configuration">
In the file you will find descriptions of the solid app:
<#this>
    a <http://usefulinc.com/ns/doap#Project>, <http://www.w3.org/ns/solid/app#Configuration> ;
    <http://usefulinc.com/ns/doap#description> "A Video Saving for the Solid platform" ;
    <http://usefulinc.com/ns/doap#download-page> <https://melvincarvalho.github.io/video/> ;
    <http://usefulinc.com/ns/doap#homepage> <https://melvincarvalho.github.io/video/> ;
    <http://usefulinc.com/ns/doap#license> "mit" ;
    <http://usefulinc.com/ns/doap#maintainer> <http://melvincarvalho.com/#me> ;
    <http://usefulinc.com/ns/doap#name> "Video" ;
    <http://usefulinc.com/ns/doap#shortdesc> "A Video App for the Solid platform" ;
    <http://usefulinc.com/ns/doap#shortname> "Video" ;
    <http://www.w3.org/ns/solid/app#description> "A Video App for the Solid platform" ;
    <http://www.w3.org/ns/solid/app#homepage> <https://melvincarvalho.github.io/video/> ;
    <http://www.w3.org/ns/solid/app#icon> <http://melvincarvalho.github.io/video/images/icon.png> ;
    <http://www.w3.org/ns/solid/app#name> "Video" .
This enables linked data app stores to process your app, copy and install it to new spaces.
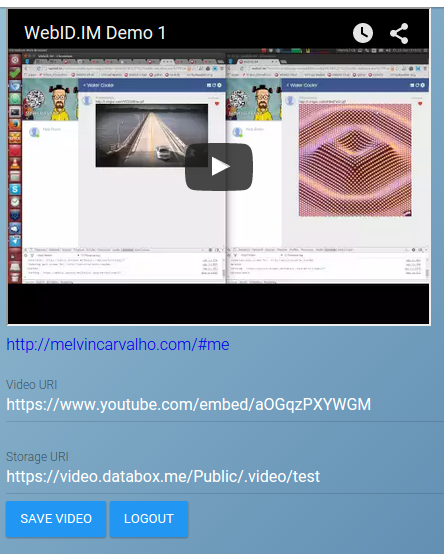
When all this is combined you will see a running something like:
Summary
In this tutorial we showed how to embed video in a page. Some more advanced UI techniques such as sidebar, menu and dialog boxes were covered. We also showed how to make your app sematnically rich using maifests, DOAP and auto discovery. In the next tutorial we will expand on these patterns and create a more complex game type app.